Tiếng Việt
Porcelain veneer images always serve as visual proof of a dramatic smile transformation. At Domin Dental Clinic, many patients have experienced and clearly noticed the difference after veneer treatment—from tooth color and shape to the overall harmony of their smile.
Before and after porcelain veneer results
Before getting veneers, teeth often present issues such as discoloration, minor gaps, chips, uneven alignment, or poor enamel aesthetics. These imperfections can make the smile look dull and reduce overall facial attractiveness.
A typical example is Ms. Lê Thu Trang (Hanoi), who had long-term tooth discoloration, worn enamel, and a rough tooth surface, making her teeth appear dark, coarse, and lifeless. Before treatment, her smile lacked brightness, had uneven color, and the tooth shape did not harmonize well with her facial features. These issues made her feel less confident and hesitant to smile in social situations.


Porcelain Veneer Procedure Images
To better understand the transformation after veneer treatment, let’s take a closer look at the step-by-step process, starting with the consultation and examination stage.
Consultation and Examination Stage
In the veneer process, the consultation and examination step is the most important foundation.
At this stage, the dentist captures the patient’s smile from multiple angles—including front view, side profile, and close-up shots of the teeth—to fully assess the oral structure and overall smile aesthetics.

At the same time, the facial structure is analyzed to determine harmonious proportions, lip curvature, and the most suitable smile style.
Based on the collected visual data, the dentist will suggest appropriate tooth shapes—ranging from natural and feminine to more youthful or bold styles, depending on the patient’s facial features and personal preferences. This step lays the foundation, helping patients clearly visualize their new smile before moving on to the veneer design stage.
Digital impressions and smile design
After the examination, the patient undergoes intraoral 3D scanning to capture precise data of the natural teeth structure.
From this digital model, the dentist proceeds with Digital Smile Design (DSD)—a technology that analyzes the proportions of teeth, lips, and facial features in detail to create an ideal, customized smile design for each individual.

A veneer preview simulation is also created directly from this data, allowing patients to see the expected tooth color, shape, and overall smile transformation in advance. This makes the consultation process more transparent and helps patients confidently choose the smile style that best suits them before moving to the next steps.
Minimal tooth preparation images (if required)
Do veneers require tooth preparation? Depending on each case, the dentist will determine whether preparation is necessary.
If needed, the dentist will perform ultra-thin enamel reduction, creating just enough space for the veneer to fit seamlessly without feeling bulky or unnatural.

Close-up images at this stage show that the enamel reduction is extremely minimal, typically only 0.2–0.5 mm, helping preserve maximum natural tooth structure. The tooth surface after preparation is carefully smoothed while maintaining its natural integrity, minimizing sensitivity thanks to precise techniques and specialized instruments.
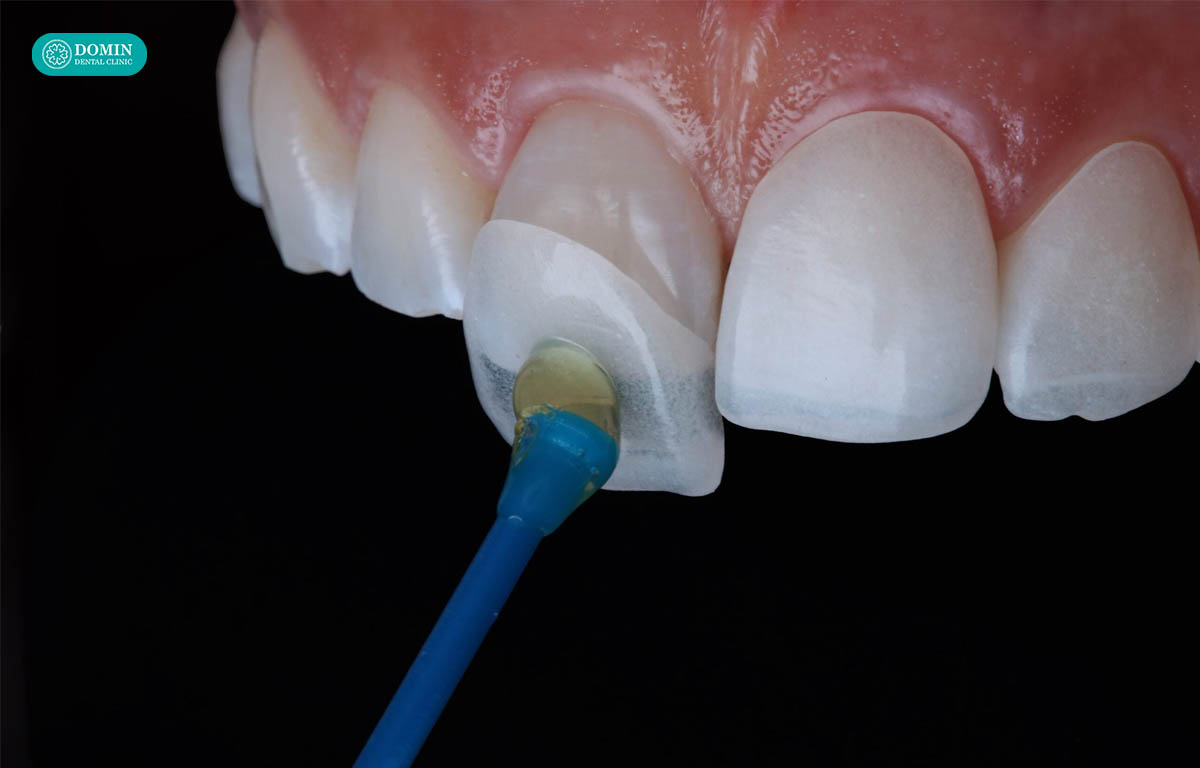
Veneer try-in stage
After the veneers are fabricated, the next step is to place them temporarily on the patient’s teeth to evaluate the shape, color, and overall harmony with the smile.
Images at this stage show the veneers being positioned for trial, allowing the dentist to accurately assess the bite alignment, fit, and spacing between teeth.